
The Xylophone of the Future (with LEDs)
A real show of the future needs lights, right? In this mission, we'll build a magic xylophone that doesn't just make sound — it lights up too. You won't just play notes by tilting your device, you'll also control a light that dances across the screen in perfect synchronization with every sound. You'll learn the powerful technique of using a single sensor input to control multiple outputs at the same time.
Level Basic
What will we do?
Are you a teacher?
Courses
- Grades 3-12
Materials
- Cell phone and computer
- Internet connection
- Cardboard, scissors and a couple of rubber bands to hold the phone against the cardboard
Description
Students will build a xylophone in which the tilt sensor controls a musical note and the position of an LED on the screen at the same time. This reinforces the concept of mapping data while introducing the ideas of visual feedback and synchronization.
Educational Objectives
- Understand the concept of mapping a single data input to multiple outputs.
- Provide real-time visual feedback for the state of a sensor.
- Build a richer, more interactive audiovisual prototype.
- Understand how different kinds of output (sound and light) stay synchronized.
Start (10 minutes) - What's Missing from Our Music?
- Welcome the students: "Think of an instrument that you play with movement. But think about a concert or a video game... what always goes together with the music to make it more exciting?" The key answer is: lights!
- Pose today's challenge: "We're going to turn our xylophone into a complete audiovisual show. How could we make a light on the screen move left and right, following the melody we play by tilting the device?"
- This introduces the main concept: using the same tilt sensor data to control two things at once.
Beyond Sound: Visual Feedback
When you press a key on a real piano, you don't just hear it, you also see it move. That visual confirmation is called feedback. It makes the whole experience much more intuitive! In our digital projects, we can do exactly the same thing. By adding a light that moves along with the sound, we give the user instant visual feedback. It doesn't just look great, it also helps them understand the connection between the movement and the result.
Connecting to Multiple Outputs
This is where programming gets really powerful. Mapping to Multiple Outputs means using the information from a single sensor to control two or more different things at the same time. Imagine you're an orchestra conductor. With a single wave of your baton (the tilt), you tell the violinists which note to play (the sound) AND the lighting technician which spotlight to switch on (the LED). One gesture, several synchronized results!
Adapting the Data: The Magic Division
The tilt sensor gives us a pretty wide range of numbers. But our LED screen is small (only 7 LEDs tall), and the musical scale we want to use is limited too. If we used the sensor's number directly, the dot of light would shoot off the screen in an instant! To solve this, we need to scale the data, or adapt it. Using a simple mathematical operation like division, we can shrink the sensor's range of numbers so that it fits our screen perfectly. But dividing isn't enough: the result stays centered on zero, with negative numbers that would fall off the screen. That's why we also add 4 —the center LED— and round the result, because the screen only understands whole positions. With the phone held still, the dot sits right in the middle.
Development (20-30 minutes) - Building the Audiovisual Show
- Now that the students understand the goal, it's time to add the visual dimension.
- Guide them through the instructions for building the LED screen component together with the sound, as detailed below. It's crucial that they understand how the very same tilt value is used in two different places in the code.
Closing (5-10 minutes) - Synchronization Is the Key
- Once every xylophone has its lights and sound in sync, reflect on the concept.
- Ask the class: "Why do the light and the sound move together? Which part of the code is responsible for that synchronization?" Use the questions in the reflection section to explore the mathematics behind data mapping and to think about other possible combinations.
Reflect
Which part of the code makes sure the light and the sound never fall out of sync?
Why did we have to divide the sensor value before using it to calculate the LED's position? What would happen if we removed the division block?
Beyond Sound: Visual Feedback
When you press a key on a real piano, you don't just hear it, you also see it move. That visual confirmation is called feedback. It makes the whole experience much more intuitive! In our digital projects, we can do exactly the same thing. By adding a light that moves along with the sound, we give the user instant visual feedback. It doesn't just look great, it also helps them understand the connection between the movement and the result.
Connecting to Multiple Outputs
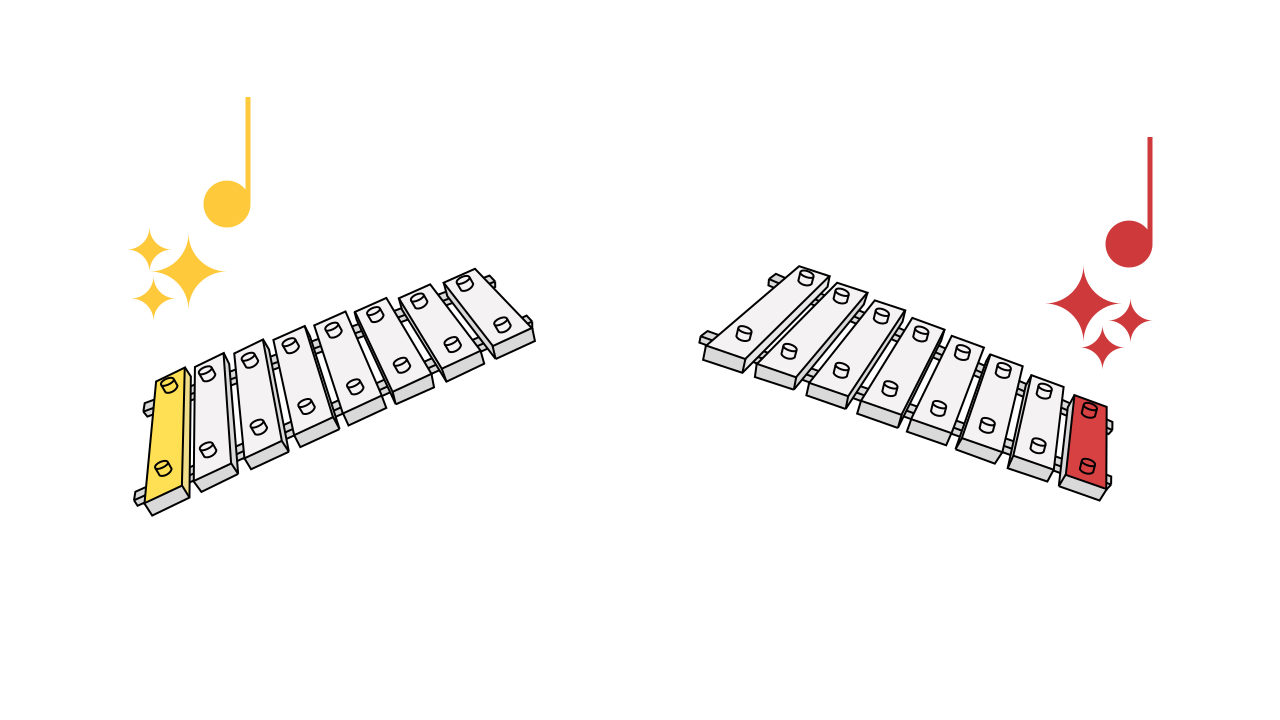
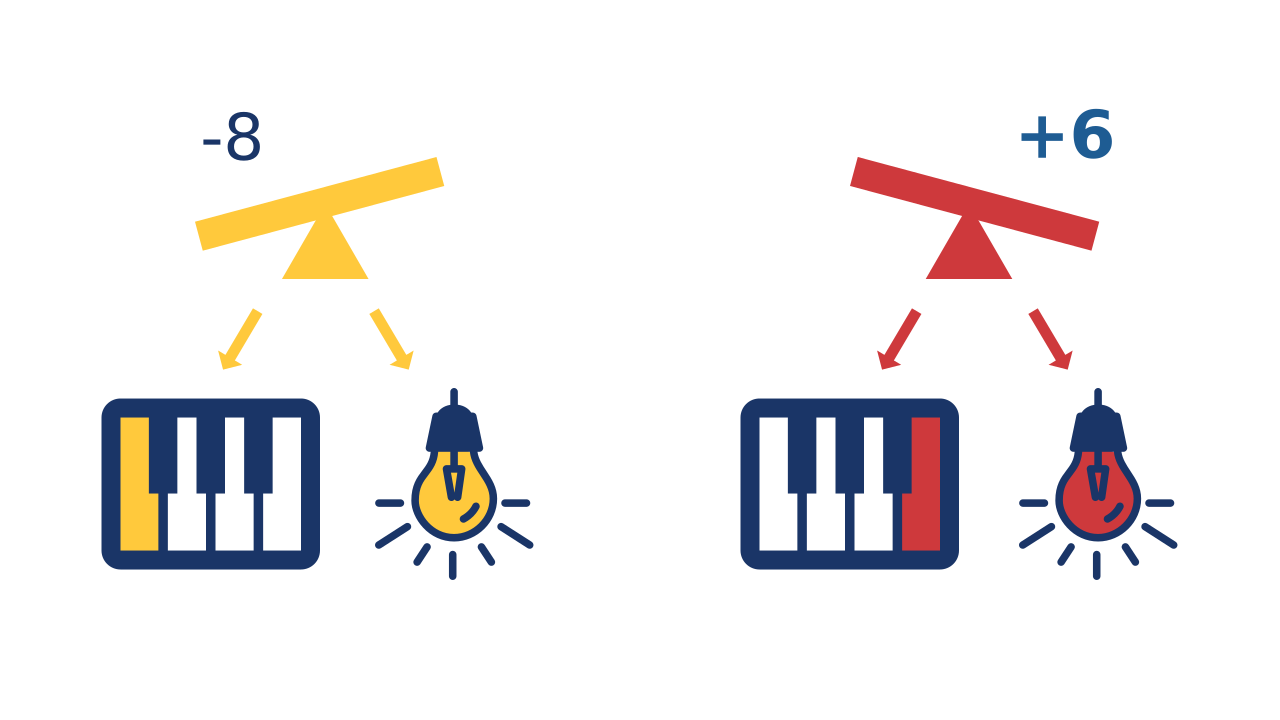
This is where programming gets really powerful. Mapping to Multiple Outputs means using the information from a single sensor to control two or more different things at the same time. Imagine you're an orchestra conductor. With a single wave of your baton (the tilt), you tell the violinists which note to play (the sound) AND the lighting technician which spotlight to switch on (the LED). One gesture, several synchronized results!
Adapting the Data: The Magic Division
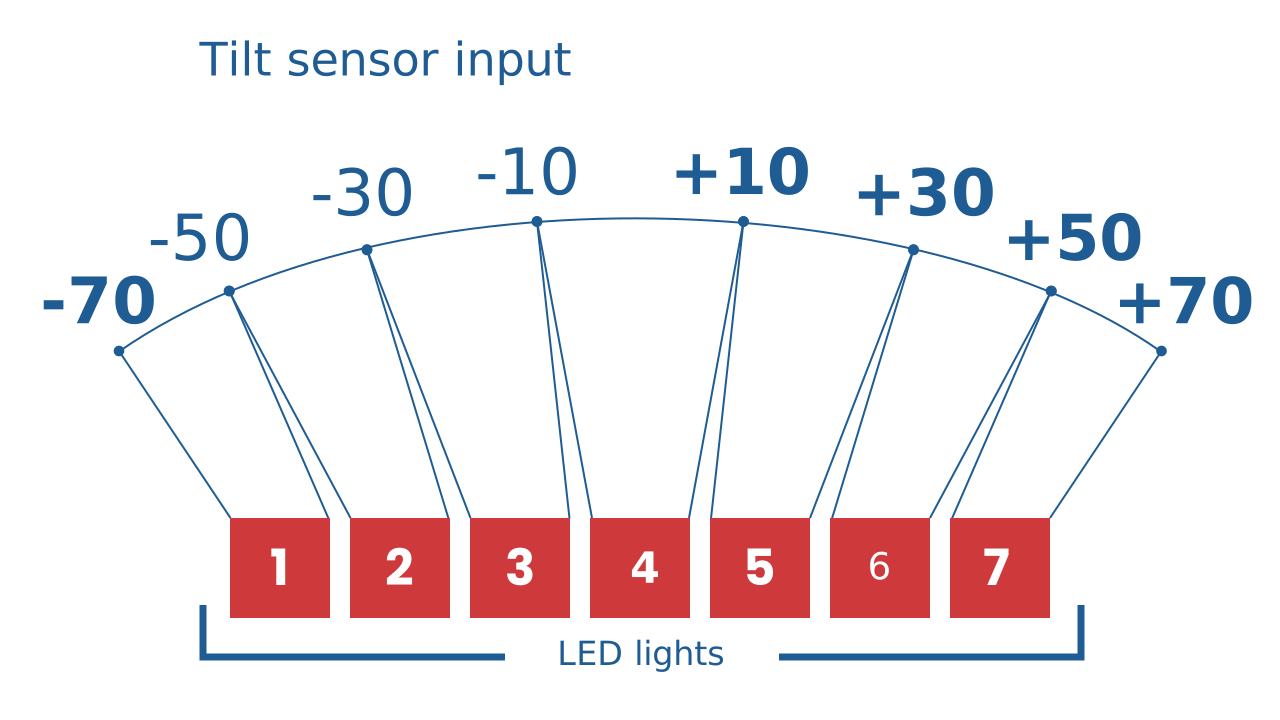
The tilt sensor gives us a pretty wide range of numbers. But our LED screen is small (only 7 LEDs tall), and the musical scale we want to use is limited too. If we used the sensor's number directly, the dot of light would shoot off the screen in an instant! To solve this, we need to scale the data, or adapt it. Using a simple mathematical operation like division, we can shrink the sensor's range of numbers so that it fits our screen perfectly. But dividing isn't enough: the result stays centered on zero, with negative numbers that would fall off the screen. That's why we also add 4 —the center LED— and round the result, because the screen only understands whole positions. With the phone held still, the dot sits right in the middle.
Create
Let's build the xylophone of the future.
Build the cardboard model— you will also need a couple of rubber bands to hold the phone against the cardboard
- Press ✙ Add device and select MusicalKeyboard for the sound.
- Also add the Inclination component to read the movement.
- Finally, add LEDDraw for our visual output.
- Remember to scan or open all of the components. For this project, you can put them all on the same smartphone!
We're ready to create an audiovisual show!
Code Composition
Click on the question mark to open the comments. The key to this code is that the tilt is read twice, and both formulas have the same shape: a resting value plus the deviation. For the sound, 60 + inclination. For the light, 4 + inclination ÷ 15. One piece of data, two scales, the same idea — that's why the light and the sound never fall out of sync!
Reflect
Which part of the code makes sure the light and the sound never fall out of sync?
Why did we have to divide the sensor value before using it to calculate the LED's position? What would happen if we removed the division block?